Monday, December 9, 2019
Signing Off
Seeing is as tomorrow is the last day of class, it is time to wrap up this blog. Through the close call of falling into the Shiloh Conservation pond to extremely cold fingers adjusting settings in the Beartooth's, I rather enjoyed the class. There are three major things that I will keep with me in the future. The first is to keep all of my corners clean. At first I did not think that it was super noticeable in my earlier pictures, but looking back on them now, I realize that none of my corners were clean. The second tidbit that I have picked up is that every camera has an autofocus button. Up until four weeks ago, I was shooting all of my pictures with a manually focused lens. Now that I have been using the autofocus button, my pictures as of late have been slowly getting clearer and clearer. The third thing that I have picked up is to not be scared of shutter and aperture priority modes. I was always taught not to use them because they were the "cheaters way" or the "easy way" to get good pictures. These modes are amazing and produce beautiful photos. Overall, I enjoyed taking the class and I think that I will keep doing it as a hobby and see what the spring and summer bring to the photo world.
Final Twenty Five
The settings for each picture is the information above the photograph. Also, up until four weeks ago, I had no idea that there was an autofocus button, therefore the pictures that were taken beforehand with manual focus will be labeled.
ISO-3200 -- Aperture- ƒ/11 -- Shutter speed- 1/4000s

ISO-400 -- Aperture- ƒ/11 -- Shutter speed- 1/200s

ISO- 800 -- Aperture- ƒ/5.6 -- Shutter speed - 1/2500s -- manual focused

ISO-200 -- Aperture- ƒ/5 -- Shutter speed - 1/500s

ISO- 400 -- Aperture- ƒ/5 -- Shutter speed - 1/1250s

ISO- 400 -- Aperture- ƒ/5 -- Shutter speed - 1/800s -- manually focused

ISO- 800 -- Aperture- ƒ/5.6 -- Shutter speed - 1/2000s -- manually focused

ISO- 800 -- Aperture- ƒ/5.6 -- Shutter speed - 1/2000s -- manually focused

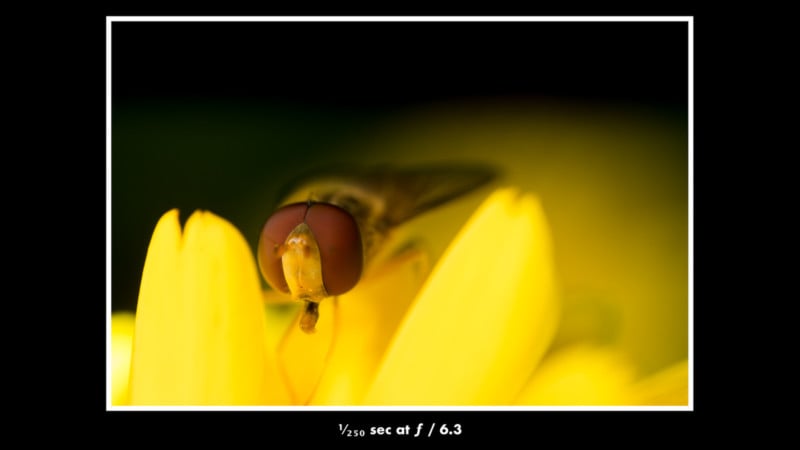
ISO- 200 -- Aperture- ƒ/6.3 -- Shutter speed - 1/1600s

ISO- 400 -- Aperture- ƒ/5.6 -- Shutter speed- 1/2000s

ISO- 800 -- Aperture- ƒ/9 -- Shutter speed - 1/4000s

ISO- 100 -- Aperture- ƒ/22 -- Shutter speed - 1/100s

ISO- 400 -- Aperture- ƒ/22 -- Shutter speed - 1/125s

ISO- 400 -- Aperture- ƒ/5 -- Shutter speed - 1/4000s

ISO- 400 -- Aperture- ƒ/5.6 -- Shutter speed - 1/2000s

ISO- 3200 -- Aperture- ƒ/13 -- Shutter speed- 1/800s -- manually focused -- With the knowledge of the autofocus button now, if I were to go back and take this picture I would put the camera into aperture priority mode and adjust the ISO and Shutter Speed accordingly -- The ISO on this picture is also a little high due to the overcast on the day the picture was taken.

ISO- 32 -- Aperture- ƒ/2.2 -- Shutter speed - 1/3968s *this picture was taken off of an iPhone 6

ISO- 400 -- Aperture- ƒ/8 -- Shutter speed - 1/2500s

ISO- 3200 -- Aperture- ƒ/5.6 -- Shutter speed - 1/4000s

ISO- 200 -- Aperture- ƒ/20 -- Shutter speed - 1/60s

ISO- 200 -- Aperture- ƒ/6.3 -- Shutter speed - 1/1600s

ISO- 800 -- Aperture- ƒ/5.6 -- Shutter speed - 1/2000s -- manually focused -- The shutter speed on this picture is higher than it should be, if I were to go back and to this again I would definitely lower it.

ISO- 800 -- Aperture- ƒ/5.6 -- Shutter speed - 1/2000s -- manually focused

ISO- 3200 -- Aperture- ƒ/9 -- Shutter speed - 1/4000s -- manually focused

ISO-1600 -- Aperture- ƒ/5 -- Shutter speed - 1/200s

Wednesday, December 4, 2019
Wooden
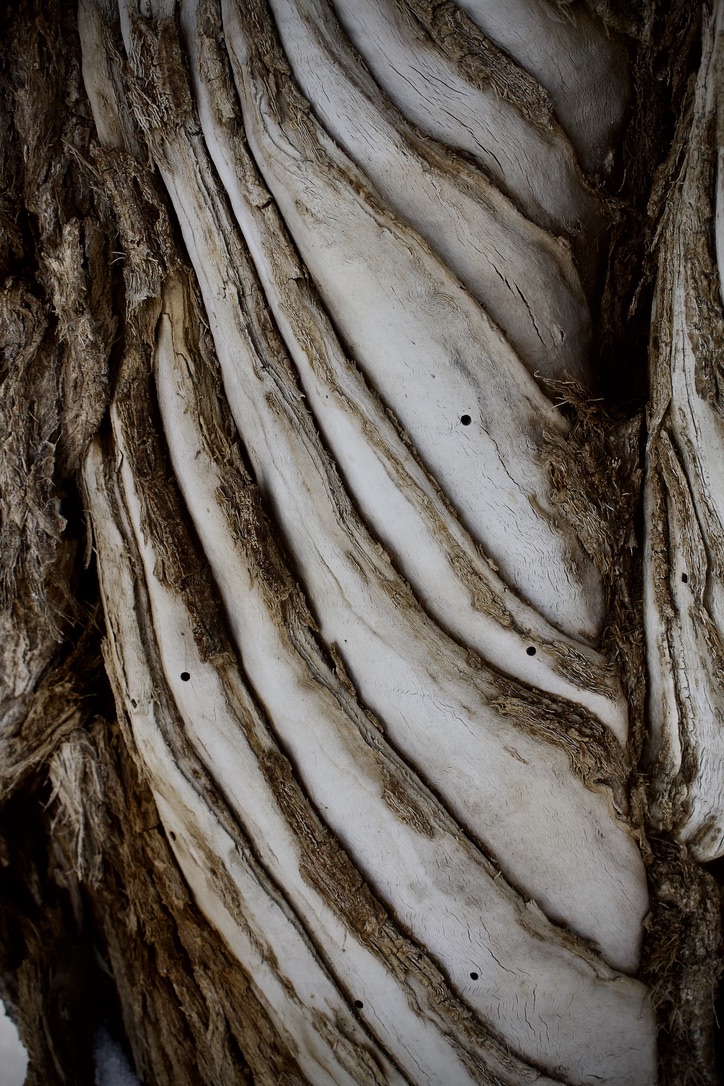 This photo was taken at Duck Creek yesterday morning. I am absolutely in love with the pattern in it. It was taken at an ISO of 400, a shutter speed of 1/200s, and an aperture of ƒ/10.
Monday, November 18, 2019
Lightly Snowy
This past weekend, my honey and I went out to Red Lodge so I could get some good shots for this class. I had the idea that we should leave home by 6 am to catch the sunrise. Needless to say, he's not a morning person, so we hit the highway about 7:15 and made it to the Beartooth Pass around 8:30 am. This was perfect timing because there was enough light to not have to crank my ISO up super high and there was still frost on the trees as well. Unfortunately, I was not able to get a lot of pictures with perfect focus so I only got a few usable shots. I believe that we are going to go back this weekend so I can try and retake the unfocused shots. Of the pictures that I do like, these are the better ones of the batch.

 Snowy Grass: ISO 400 -- Aperture ƒ/5 -- Shutter speed 1/1250s
Tree lined creek: ISO 3200 -- Aperture ƒ/13 -- Shutter speed 1/500s


Tree lined creek: ISO 3200 -- Aperture ƒ/13 -- Shutter speed 1/500s
Wednesday, November 13, 2019
Share Two and Critique #3


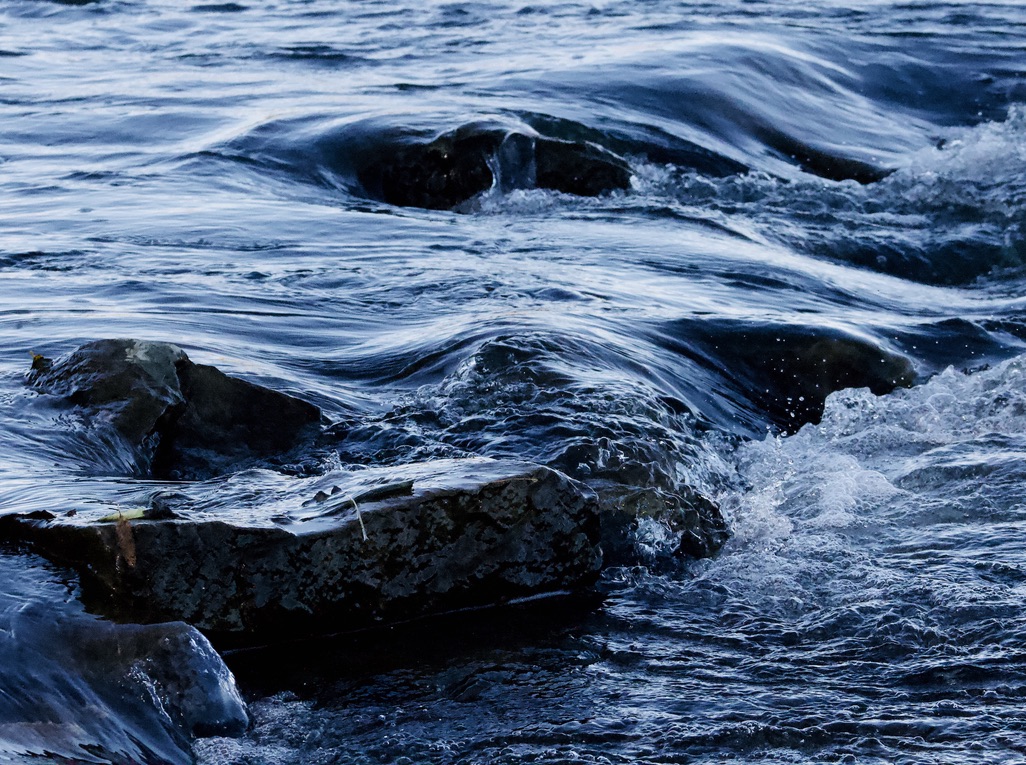
Icy
This picture was take at Riverfront Park in Billings with an ISO of 3200, an aperture of ƒ/5.6, and a shutter speed of 1/4000. These are common settings for me because I tend to either go in the evening or find interesting things where there is not a whole lot of light shining down on my subject. The subject in the photo is the icy edge. I thought that with a shutter speed quite high, I could catch the water in still but it was moving a little too fast. I was surprised that I was able to catch a rippled reflection which added an interesting flare to the picture in my opinion.


Tuesday, November 5, 2019
Benefits of a 75-300mm Lens
So I am using a Canon EOS Rebel T3 which I rented from the library at Rocky. It came with a 75-300mm lens which I never though I would want to use. Once I used it, I couldn't figure out what I loved about it so much other than the ability to zoom in. So I did a little digging and found out some interesting reviews of the lens. After looking at the lens I noticed it is a Canon EF 75-300mm f/4-5.6 III. When looking at the review posted on The Digital Picture ( https://www.the-digital-picture.com/Reviews/Canon-EF-75-300mm-f-4-5.6-III-USM-Lens-Review.aspx) I am unsure if I really want to use it anymore.
The review said it is cheap, lower sharpness, and you need a lot of light to obtain great handheld photos. I can say that I have noticed that once you zoom in to anything past 100mm, the sharpness does tend to go out of the window if you are attempting a hand held photo. On the cheapness side of things, I guess it is a good thing that I baby the entire carrying case. I would be petrified to fork over $300 to replace the lens even if it isn't the best. Luckily for me, my schedule typically only allows for me to shoot photos during the times of day with the most light. Yeah yeah, "get up earlier" they say, when work starts at 5am you don't have an option for that. Regardless, since I am a beginner I think it does what I ask it to do with the skills that I have and I can't complain a whole lot.
The review said it is cheap, lower sharpness, and you need a lot of light to obtain great handheld photos. I can say that I have noticed that once you zoom in to anything past 100mm, the sharpness does tend to go out of the window if you are attempting a hand held photo. On the cheapness side of things, I guess it is a good thing that I baby the entire carrying case. I would be petrified to fork over $300 to replace the lens even if it isn't the best. Luckily for me, my schedule typically only allows for me to shoot photos during the times of day with the most light. Yeah yeah, "get up earlier" they say, when work starts at 5am you don't have an option for that. Regardless, since I am a beginner I think it does what I ask it to do with the skills that I have and I can't complain a whole lot.

Tuesday, October 29, 2019
Let It Snow
Unsurprisingly, Montana has been seeing some snow in the last few couple of days and it is sure chilly up here. Now that snow has fallen, it is one of the only options for photographers to shoot unless you can find a greenhouse. So in light of our new blanket of show, I figured that some tips on capturing snow photos from Craig Hull's article "Snow Photography: 15 Winter Landscape Tips"
may be beneficial. I am only going to cover the ones that are a little more important for this class.
may be beneficial. I am only going to cover the ones that are a little more important for this class.
https://expertphotography.com/snow-photography/

Tip #1 Exposure Compensation: For this, Over exposing by one or two stops will help you whites stay white and your highlights can be edited in post-processing.
Tip #2 Use Flash Setting Instead of Daylight to Warm Up the Image : The flash setting will help try and warm up but be careful not to over do it especially in post-processing. Snow is supposed to have a blue tint since it is made of water after all.
Tip #3 Rely on Your Histogram to Check the White Balance:
Tip #4 Use Aperture Priority to Quickly Change DoF: Aperture priority mode is for the camera to auto adjust your shutter speed within the camera
Tip #5 Post-Process to Bring Out Details in the Sky
Tip #6 Buy a Rain Cover
Tip #7 Keep the Camera Acclimatized: try using a ziplock bag, it will hold less moisture than your coat will. And keep two charged batteries on you at all times.
Tip #8 Stock Up on Microfiber Cloths
Tip #9 Try a Polarising Filter to Limit Snow Reflection: From reducing glare off of the snow to darkening skies, it will help keep the color and light balance that you desire.
Tip #10 Use a Lens Hood
Tip #11 Focus on the Contrast
Tip #12 Capture Snow Photography Bokeh: This is attainable by using a wide angle lens and focus on something other than the snow like a person or an animal. You want to make sure that the person is in focus and everything behind them is in focus as well.
Tip #13 Dress in Layers to Stay Warm
Tip #14 Photograph in the Mornings to Capture Snowy Details
Tip #15 Don't Let the Weather Stop You
Wednesday, October 23, 2019


On The Fence
With this picture, I got a sense of rustic life and a feeling of calmness. I took this over at the Duck Creek Access to the Yellowstone river. To my surprise, there was no wind in this area to disturb the grass. The lighting was just right to not overexpose anything. The ISO was 800, the aperture was f/5.6, and the shutter speed was 1/2000s.


Wednesday, October 16, 2019
Ducks
 This photo has to be one of my favorites that I took at the Shiloh Conservation Center two weeks ago. When I was walking around the park, there was a duck I had noticed out in the center of the pond Which I thought might make an interesting shot. So I hunkered down to try and get the shots and after multiple attempts to get it, I pulled my head up and noticed two ducks less than 3 feet away from me. In order to get this picture, I had an ISO of 400, an aperture of 4.5 and a shutter speed of 1/250.
Wednesday, October 9, 2019
Cattails
 For this photo I went to the Shiloh Conservation Center. I went this Monday and It was a little bit windy but I managed to capture this beauty. I had to compromise my aperture a little bit to ensure that my shutter speed was quick enough. My ISO was 1600, shutter speed was 1/4000, and my aperture was f/4.5. Also, I had to kick up my ISO due to the fact that there was a bit of cloud cover. I made this photo black and white to make the lone cattail a little more noticeable and dramatic.
 Tuesday, October 1, 2019
Macro-ing it Up
As you might have read in a previous post, I love macro photography. It seems like the only type of ideas that I come up with when shooting macro is flowers. Therefore, I did the google thing and found some more interesting subjects to shoot. The article that I found that gave me the most ideas was "Top 27 Amazing Macro Photography Ideas That Will WOW People!" by Lewis T.
(https://tripodyssey.com/macro-photography-ideas/). I should probably state that for the record that bugs like spiders, centipedes, and things of that nature are out of the question for a subject! I am a typical woman when it comes to anything that is small and crawling. Laugh all you want but no way am I getting close to any bugs.
Some of the subjects that Lewis T mentions in this article are thing that I never would have thought of. The first one that I was shocked by was the idea of denim. I mean sure there are different patterns on the pockets but I never would have thought looking at the different stitches and dyes. Though it's not nature it's still interesting.
Water droplets were the first nature macro idea that I have not done before. This is probably because whenever I have done macro its been winter and inside a green house. But shooting Water droplets could be my new favorite, I guess we will see when I try things out.
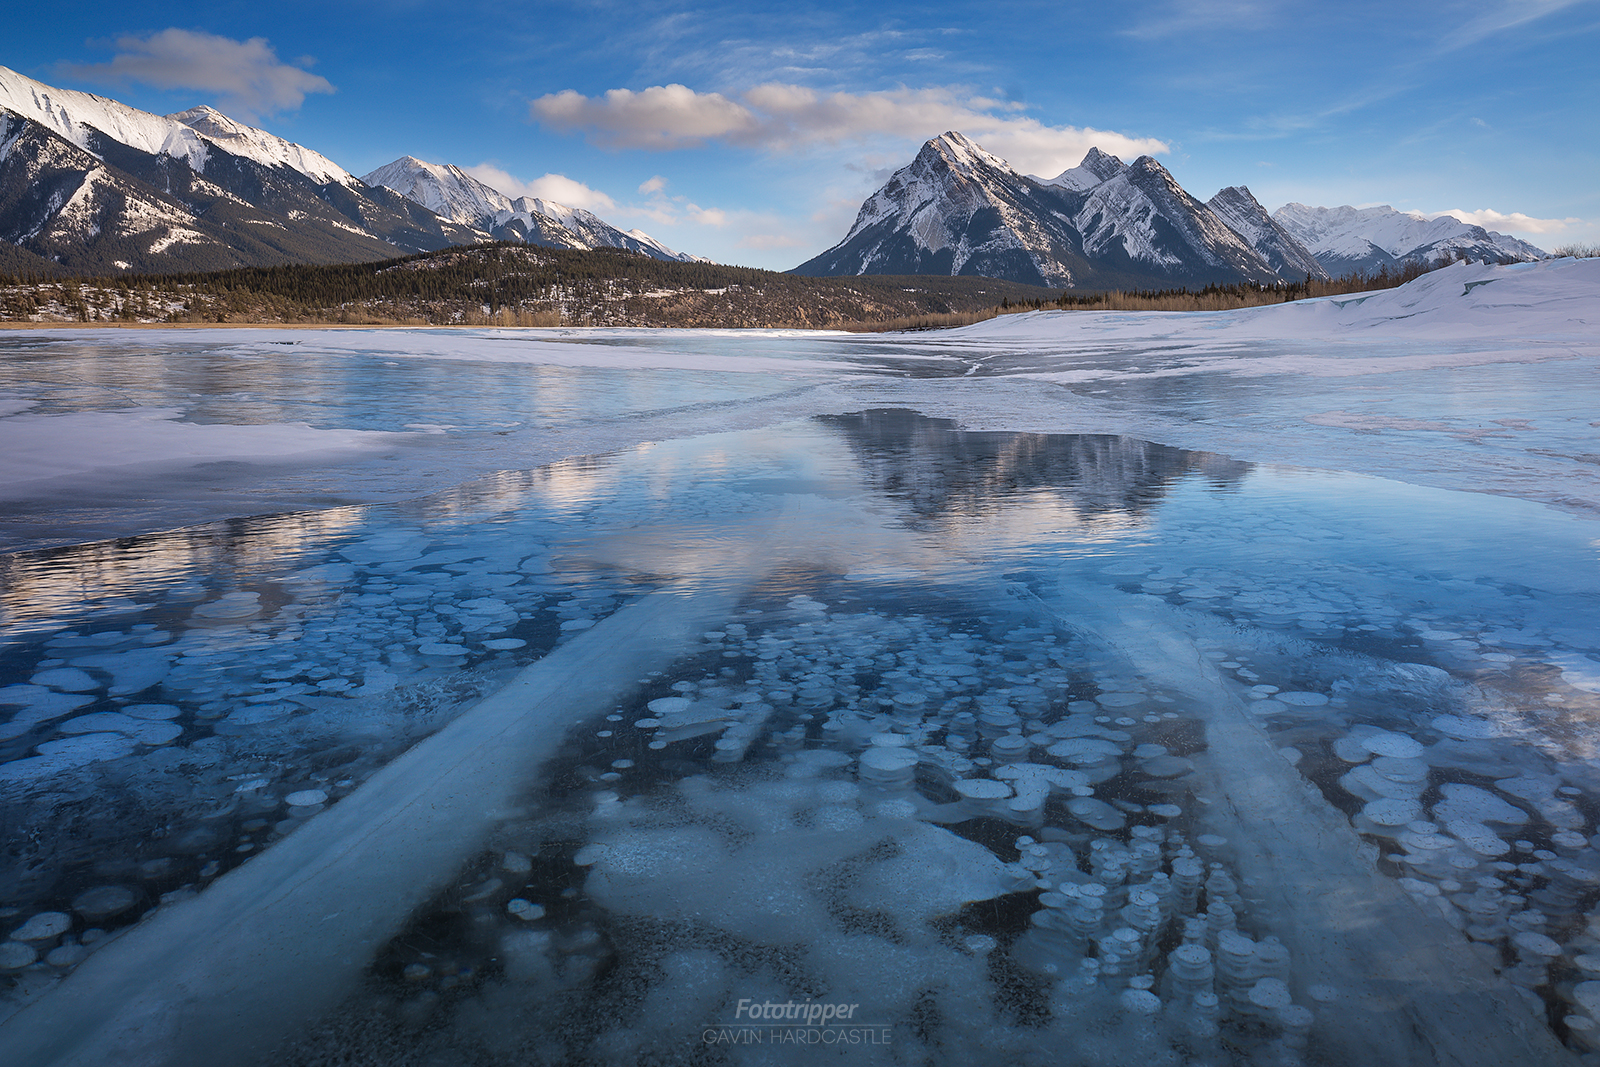
The last idea that I thought of that was not included in the article would be ice on a river or a lake. Living in Montana it seems as though this would be obvious for me, but it just struck me due to the fact that snow is currently falling....it's the first day of October. I guess I'll get my chance to shoot ice sooner than expected. I found this picture of Abraham Lake by Gavin Hardcastle an amazing example of frozen lake photography. If i were to find anything like this I would make an attempt to shoot more of the bubbles under the lake.
Wednesday, September 25, 2019
A Guide to Photograph the Milky Way
The night sky is something I have always been interested, but with living in Billings there is rarely a chance to get a good look at the Milky Way and the constellations in the night sky. Here is a guide to photographing the Milky Way in the article "How to Photograph the Milky Way in 12 Steps (With 6 Epic Examples)" by Jason D. Little (https://www.lightstalking.com/how-to-photograph-the-milky-way/). Since I am not familiar with night photography of any sort I will be listing all of the steps that are key for night photography in particular and skimming on the ones that make a little more sense :
The 12 steps include:
1. Finding a Dark Sky: As I had thought, the author suggests to find an area without a lot of light pollution. One of the tips with this that I hadn't thought about was to make sure there isn't a full moon.
2. Knowing When and Where to Look: As it turns out there is an optimal time to capture the Milky Way in the Northern Hemisphere. This time happens to be between the months of February and September so unfortunately the time for me to shoot that is almost up.
3.Use a Digital Camera with Good High ISO Capabilities: this one did seem a a little obvious to me just because without a high ISO capability, you won't get a very good picture
4.Using a Fast Wide Angle Lens: the maximum aperture of at least f/2.8
5. Using a Tripod
6. Use Live View: I had no idea that this was an option on some cameras. Or maybe I know it as something different, either way, focusing on one bright star will help capture the distance
7. Staring with an ISO of 3200
8. Setting a Long Shutter Speed: This along with the tripod should help keep everything in focus.
9. Setting a Wide Open Aperture
10. Compose the Shot: add a little flare by capturing a building or something stationary in the picture along with the sky.
11. Getting a Satisfactory Exposure: this may take a few times to get right but the more practice the better right? Little includes that "If there’s too much noise, simply decrease the ISO. If the shot is overexposed, check your surroundings for light pollution; decrease shutter speed; stop down the lens; or decrease ISO. If it’s underexposed, make sure you’re using the widest aperture on your lens; increase shutter speed (but beware of star trails forming); increase ISO, " which will be really helpful to reference later.
12.Process the picture which include the editing process.
There are a lot of tips and tricks that I can not wait to try and use! Milky Way From The Alabama Hills Photo by John Lemieux, is one of the photos from the article that I though was gorgeous!
Tuesday, September 24, 2019
Aperature and Shutterspeed Extremes
The three keys to a good picture is the shutter speed, the aperture, and the ISO. I chose to try and capture four extremes of shutter speed and aperture.
First let's start with shutter speed.


First let's start with shutter speed.

- This first picture the fountain is an example of a shutter speed that would be too slow in order to get a crisp and clear picture of the water. The settings for this picture were an aperture of 6.3, a ISO of 800, and a shutter speed of 1/125.
- The second picture of the fountain has the correct shutter speed of of 1/1600 with an aperture of 5.6 and a ISO of 3200.
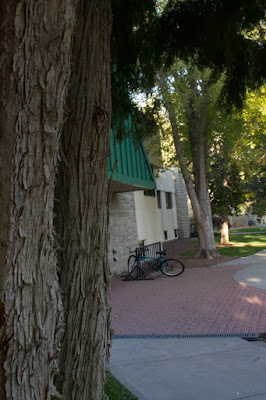
- The first picture of the tree and the building is has an aperture that is too high which makes the entire picture in focus, but I only want the tree in focus. The settings for this picture are an ISO of 800, a shutter speed of 1/20, and an aperture of 25.
- The second picture of the tree and building has the ideal aperture in order to get only the tree in focus. For this picture I had an ISO of 6400, a shutter speed of 1/3200, and an aperture of 5.


Monday, September 16, 2019
Macro Photography: I love it but it doesn't reciprocate
Macro Photography is one of the things that I am very interested in when it comes to nature photography. It is the one thing that drew me into taking my high school photography in the first place. Though I am passionate about it and I absolutely love it... I am not very good at it. In my high school class, we only had one macro lens to use and the teacher was very hesitant to let anyone use it in fear that it would get broken. Which, with that expensive of a lens mixing with high school kids, I can understand why she was so hesitant. Anyways, I have always had a knack for noticing the detail in things, like the way light shines through flower petals or the grooves of tree bark, and to be able to capture an image of the things that I see in nature would be amazing if I knew the proper techniques and right angles to capture the image. So in an attempt to gain more knowledge in this area, I came across an article which helped a little bit. 10 Macro Photo Tips for Beginners by Micael Widell (https://petapixel.com/2017/10/02/10-macro-photo-tips-beginners/ ) was a great article to start with to expand my knowledge.
Here are some of the things that I learned:
1. Whenever you are trying to capture images of bugs and little creatures, you will likely want to go to a botanical garden or even a park. The best time to do this is either on overcast days or when the weather is 63 degrees or warmer. The overcast will make the light a little less harsh than say a 40 degree day in the fall with not a cloud to be seen. By the time 40 degrees rolls around, our itty bitty friends are long gone and the light will make your pictures way too bright.
2. The flash and a diffuser are your friends if you are trying get the very minuscule details of whatever your subject is. The flash will help get the entire subject in focus and not just the smaller area that is already in focus. The diffuser however, will go between the flash on the camera and the subject that you are shooting to (as the name states) diffuse the light. This way the light will still get through but it won't be as harsh.
3. Autofocus will be irrelevant and using a tripod won't be very helpful either. When doing Macro Photography, the subject will move (insects, flowers or leaves in the wind) and then there will be the process of adjusting and moving the tripod. It is better to just stabilize the camera by holding it at three contact points and manually focussing.
4. Use interesting angles!!! Whether that be hanging your head almost upside down or laying on the ground, think outside of the box.
Here is a picture from the article
Wednesday, September 4, 2019
First Day Introduction and Autumn Photography Article

https://www.nyip.edu/photo-articles/photography-tutorials/how-to-take-perfect-fall-photos
This article gave me a few tips and tricks to get less clunky shots of the season that I am most passionate about. One of the tips included making sure that when doing a reflection shot with a lake or pond, to check the weather and see if there will be any wind to reduce the possibility of ripples in the water. Though this may seem like an obvious thought, Half of the time I forget to check the wind before going out for a photoshoot. The article also recommended working during either early morning or late afternoon, which seems like a good idea. As a college student with a busy schedule, those are the few times when I have the most free time. The last tip that seemed extremely helpful that I had no knowledge of previously was to use a wide angle lens when trying to capture a wide landscape. In the past, I have only taken multiple shots instead of trying different a different lens (if there was access to one). I am interested in seeing how these tips will help me in my photography adventure this semester.
Subscribe to:
Posts (Atom)